Sunday, July 1, 2018

Summer 2018

Hazels are not as productive as last year but some plants have a decent amount of nuts developing.


This is a new plant that just started producing nuts this year. I'm hoping the sticky red hairs on the husk will divert the squirrels. It might slow them down but it won't stop them.


 This year's spring had a few warm days and then 2 weeks of bitterly cold days, which caused winter damage on some plants and also shortened the period of time the flowers could be pollinated.
The plant here had a lot of the dead branches or branches with small leaves.  The plant must have come out of its dormant state too soon and the sub zero temps killed the branches.
I found damage on both the wild and hybrid hazels.
This spring also caused a flush of new growth from the bottom.


This is a close up of a branch with winter damage.
I did scratch the branch and found the cambium layer completely dead.


A lot of the plants had the top 4 or 5 buds damaged and if the catkins (male flowers) or stigmas (female flowers) were in this area they did not open up.


I'd like to look on the brighter side and show a few of the different types of hazelnut husks.
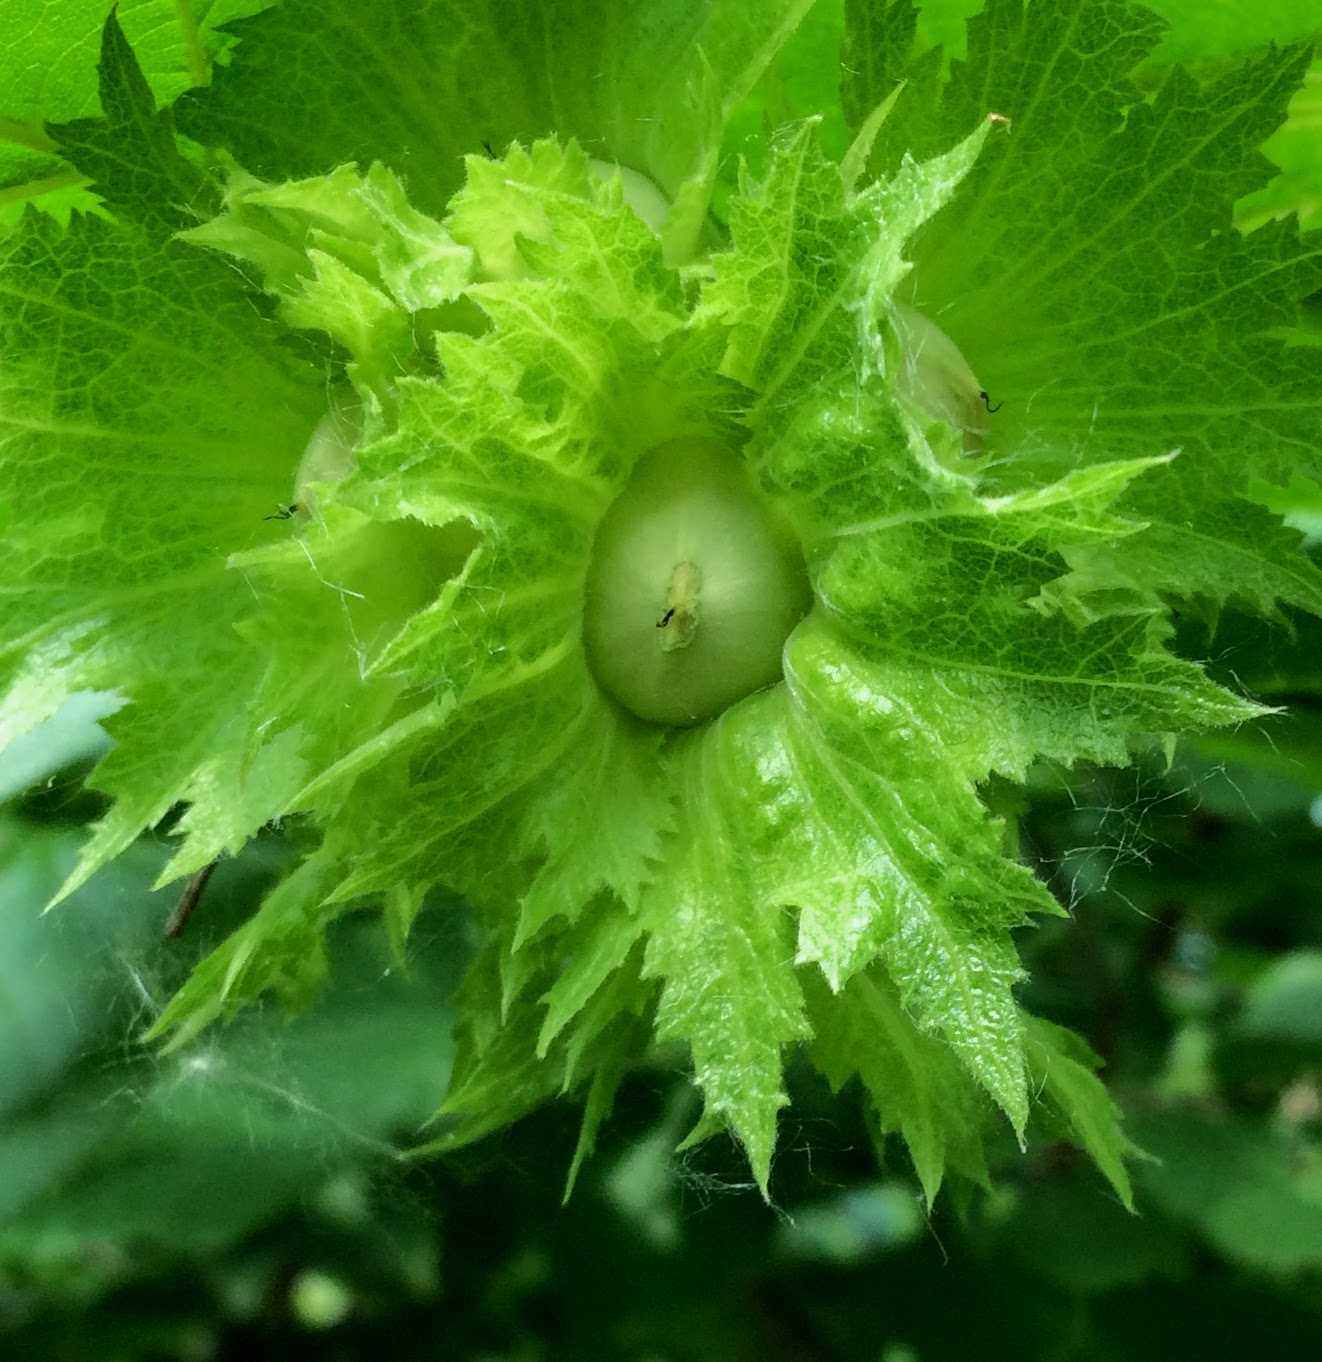

I like this plant in which the husk looks like a flower.


This is a cluster of flower type hazelnuts on the same plant.


This is another picture of the hazelnut husk with the red hairs. 
The hairs are very sticky, and the nut looks to be large.


Some plants have large clusters of nuts, which usually means a smaller nut that's hard to remove.


Some plants that ripen later in the fall have developing nuts that still are very small.
This plant ripens in late September and has larger then average nuts.


I wanted to show this picture of one of my better plants with the small developing catkins to the right of the hazelnut husk.
These catkins will produce the pollen for next year's crop.


Here we have a husk that's more open and on this plant the nuts drop out of the husk when ripe.
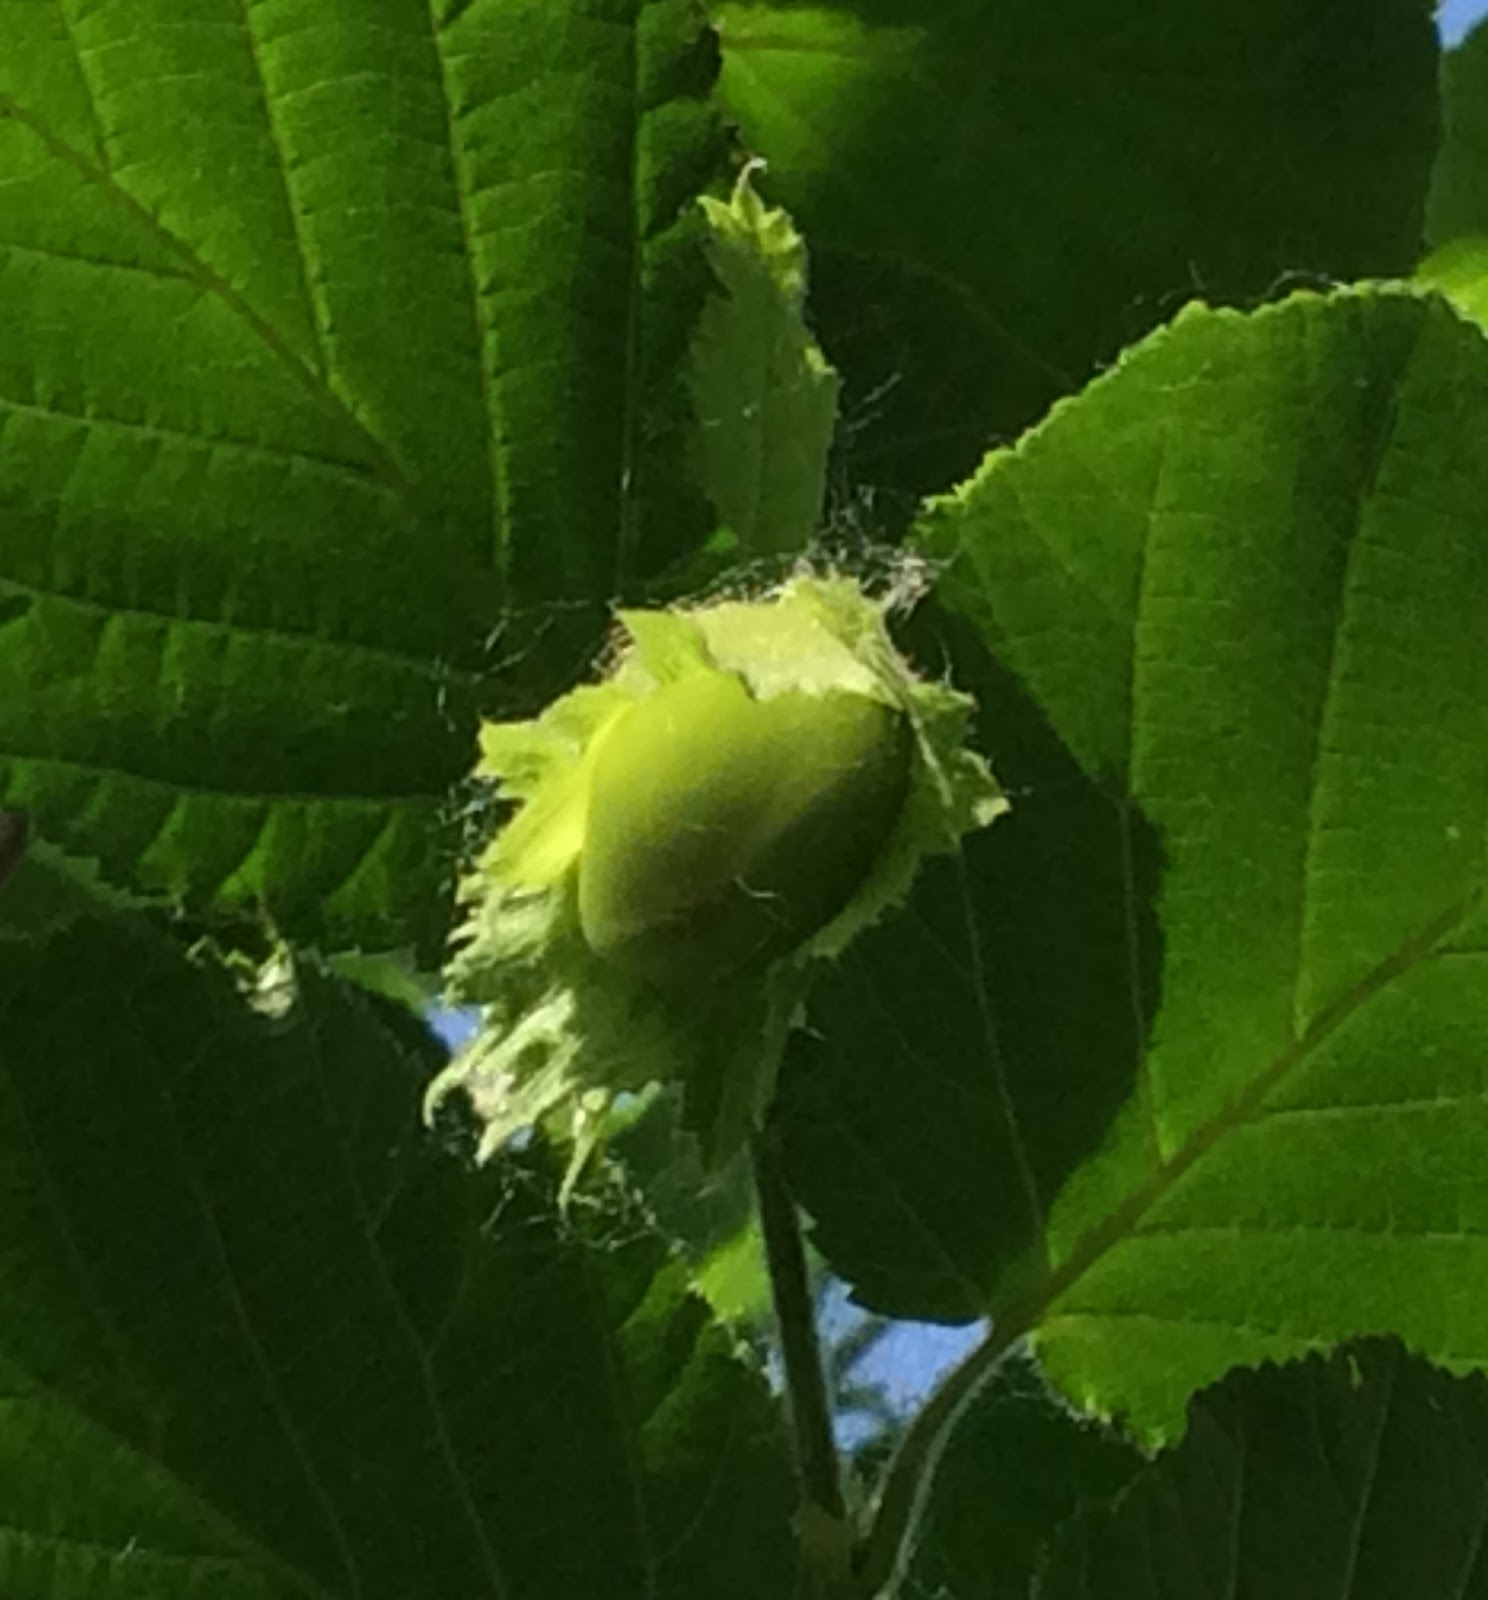


This plant has almost no husk at all and also drops out when ripe.
The plant is hard to harvest because not all the nuts ripen and fall out at the same time.


This is a wild hazelnut that has a fat juicy husk that never opens up to release the nut.
I do not like this plant at all because the husk has to be pealed by hand to release the nuts.


This plant has some of the same characteristic as the wild hazels but the nut is larger and when dried down the husk will release the nuts.


This plant tends to hold on to the nut until it is dried down and then the husk easily separates from the nuts.


This is one of the better plants with large good tasting nut. The husk is more leaf like and separates easily from the nuts.


This plant has a husk that is similar to the wild plants but it will release the nut when dry.


The husk here is very large and leaf like. This plant tends to drop the whole cluster at one time which make for fast and easy harvest.


These husks remain green even when the nut is ripe.
The plant has a good nut but hard to find when ripe.


I wanted to show diversity of plants. The one in front has a tree like structure about 7 ft tall and plant behind is more of a bush type at 4 ft tall.  Both plants are same age


Drone pictures


On the left side of the drone picture is the older hazels planted in 2005, and the hazels in the center were planted in 2010 and 2011.  I had just removed 5 undesirable from the center group, and planted new seedling.


In this picture we are looking straight down at those same plants.  At the top you can also see cages from the newly planted hazels.  In the middle you can bearly see the hazels that were planted last year.
All the plants that were planted last year were either hand pollinated nuts or clones of my best plants.
In 3 to 4 years it will be interesting to find out what type of nut they will produce.


This is a close up of those same seedlings that were hand pollinated.


This is a close up of one of the layered clones that was planted last year.
This cloned plant even has a few hazelnuts on it this year.


This is another drone picture of last years plantings and the newly planted hazels in the cages.
Please disregard the ash pile that I have not removed yet.


This is a close up of that drone picture.


 Another drone picture of that same area.


This is me and my son Bryce the drone operator.


I still have quiet a few plants for sale. 

If you're interested in purchasing these or looking at a mature hazelnut plants, contact me at riverbendhazelnuts@gmail.com or call 701-361-8581.


Tuesday, May 8, 2018

New Plants 2018

Another busy year, 2018


The nuts here germinated in 3 days after being stratified for 3 months in the refrigerator.
The stratification process involves soaking the seed to rehydrate and then placing in damp peat in plastic bags at 34º F to 40ºF for 1 to 4 months. When ready to start the germination process they are place in a covered container with damp paper towels and kept at room temperature.  They are checked daily to see if they are sprouting.
When the nuts crack and the radical begins as shown in the picture, they are then planted in tubes.


The plants in this picture are about a week old.


These are the same plants that are now 2 weeks old.


The plants here have been moved outside and are now 3 months old, and ready for sale.
If your interested contact me at, (riverbendhazelnuts@gmail.com)


Hand pollinating


Every year I hand pollinate some of my best plants and wanted to show the process I use to collected the pollen.
This first picture is showing a catkin which is the male flower that has been on the hazelnut plant since last fall.


When the catkin begins to elongate, they are removed and brought in side.


They are then placed in a warm location on a white sheet of paper for 24 hours.
The yellow dust in this picture is the pollen that has been released from the catkin.


The next step is to carefully shake and remove all the catkins until just the pollen is left on the paper.


Then the paper is folded and gently tap to fill a vial.


These are the vials of pollen from my best plants that I plan on pollinating.


Here we have the  female flower (stigmas) protruding from the hazelnut bud. The flower is rather small and some times hard to find.


To pollinate the stigmas I shake the vial to coat the end of my finger with pollen.


I then gently rub the pollen from my finger on to the stigmas.


After the flowers have been pollinated a bag is then placed back over the branch to prevent pollination from other plants.
With the cool spring this year the hand pollinating of the stigmas which usually is done the first two weeks in March was delayed until 30 of April. I usually have a week to hand pollinate the female flowers, but this year I had 2 days before the buds began to swell and cover the stigmas. It will be interesting to know how many hand pollinated followers will develop into nuts because of the late flowering and the bud swelling and covering the stigmas in just a couple days.  It appears that the stigmas do not fully appear until there are two consecutive warm days about 60ºF, and some have turned brown when the temperature dropped below 28ºF. 
Nut production might be a little low this year.  I'll give an update on my next report.  


The plants here are 4 years old, and as you can see not all are leafed out yet.
The plants in the garden tends to have a warmer micro climate inside the fence with full sun.


The 2 year old plants here are more protected and slightly more leafed out.
The term location, location rings true here.


This is a close up of the 2 year plants, and you can now see some are just starting to leaf out.


This is a picture of the orchard were the mature plants have no protection, and have just started to leaf out.
I'm wondering with almost a months delay before the plants green up if that will affect the size and taste of the nuts? 

The big question I have is will this be the normal spring for the up coming years. 
😬


Monday, March 5, 2018

Hazelnut Growers Conference and Starting new seedlings

Hazelnut Conference


I attended the  hazelnut growers conference in Owatonna, MN, where I met other people interested in developing hazelnuts for commercial growers and for home gardens. It was very interesting learning the new hazelnut research updates and processing equipment.


2018 conference schedule


I did my first presentation, which was a learning experience.


This is Lois Braun giving her presentation. I did not take any pictures because I was too busy visiting with other growers.
Thanks for the picture Lois.


Seedlings 2018


Two days after removal from refrigeration and a 80º F bath the nut has split showing the radical. I then plant these in 1 1/2 x 8 inch tubes. There will be about 10% of these nuts germinating every 2 days for the next 2 weeks. There is usually about a 40% germination rate using this method. The nuts that didn't germinate will be refrigerated for another 3 to 4 weeks. From this 2nd stratified group there is about a 90% germination rate.  

It looks like 2018 will be another busy year growing new hazelnut seedlings.


Saturday, December 30, 2017

Winter 2017 & Deer

Looking at the orchard from a drone

Taken by Bryce Johnson


After clearing most of the dead elms, buckthorn, and a couple boxelders, it opened up most of the northern part of the area. In the wooden fence on the upper left corner I planted cottonwood, bur oak, silver maple, spruce, black walnut, hazelnut, and amur maple. I'm hoping by next year the trees will start blocking that cold north wind. The fenced in area is where I plant most of the newer hazelnuts plantings. In the lower left hand corner are older plants outside the deer fence, which are subjected to the deer and rabbits.


These are the hazelnut plants outside the fence. The plant on the far left has most of the bark rubbed off from a deer and by spring the rabbits will have eaten off most of the smaller immature stems.


This is a close up of that same plant outside the fence that the deer rubbed the bark off. Most stems like this will leaf out in the spring, but this one will have to be pruned out to help eliminate any diseases that might infected the plant like EFB(Eastern Filbert Blight).  Because hazelnuts are a multistem plant, it will not affect the main plant, but you will loose some nut production.


This is another plant outside the fence that the deer decided to rub. I was going to prune this plant next spring down to 4 or 5 stems and he tore up the one stem I planned  on keeping.


This is one more hazelnut plant that was done in by a deer.


These are some of my 3 and 4 year old potted hazelnut plants that I keep behind a fence away from hungry rabbits and  deer.  The plants here are covered with wood chips and snow, so they should be ready for another winter. 


These are the 1 and 2 year old potted hazelnut plants, which should be ready for sale in the spring.


This is my buddy Al (aluminum nut cracking squirrel) who is showing nuts from several different hazelnuts ready to be processed.


The first step in the process is to sort the nuts by size. As you can see Al is inspecting the hoppers under the sorter. The slat spacings on the drum are 1/4 inch on the feed side and 1 inch on the other side.


In this picture Al is watching the drum turning as the nuts fall into the different hoppers.


Al is now inspecting the different sized nuts in the hoppers.


This is the drill powered nut cracker I use for cracking the hazelnuts.
Right above Al's head is the adjustment for the different sized nuts.
I first adjust it to crack the largest nuts, then turn the adjustment 1/4 turn in for each size.
I've found by doing it this way the shell will crack leaving the meats (kernel) whole.


Al is showing us the cracked hazelnuts after they've gone through the cracker.


This is a close-up of the cracked nuts. If you look closely some of the meats are broken.


The next step in the process is separating meats from the shell. I use an aspiration system that I made from PVC pipes, shop vac, and a few 2 inch flex hoses.
In this process the material is sucked up into the first column and the lighter material moves all the way to the top and into the second column, while the heavy meats fall to the bottom of the first column.
Can you find Al in this picture?


In this picture the cracked nuts are being vacuumed up into the first column.


For the best results of separation Al is showing us that a vacuum should be about 11 inches wc


Al is inspecting the clean and separated meats (kernels).


 I placed a ruler in the basket to show the size of the kernels.
If you look close there are a few shells left and one whole nut that will be picked out by hand.


Al is now looking through the shells for whole or broken kernels after they have gone through the aspiration system. 
I was informed by my daughter that they use hazelnut shells for mulch around plants in Oregon. I'll have to try it here around some of my plants


I wanted to show this picture of Nancy and I standing in front of one of the better hazelnut plants.
This is also one of the plants the deer picked to rub off most of the bark on two stems.😠