This was a disappointing year with frost damage in the spring and only a few hazelnuts to harvest in the fall. To top that off there was rabbit damage during the winter and me trying to pick the few nuts before the squirrels do.
This picture sent to me by a friend asking me what's wrong with these hazelnut plants. I had no idea and went to check the hazelnut plants in my orchard and found the exact same thing on several of my plants.
Every thing above the snow line had small or no leaves at all and below the snow line everything was normal. I contacted several people and they told me it looked like late frost damage.
It might also be that these plants are not quite hardy for our climate in this area.
I remove all the stems on these plants with no leaves in the fall, and listed these plants on my database as having this problem.
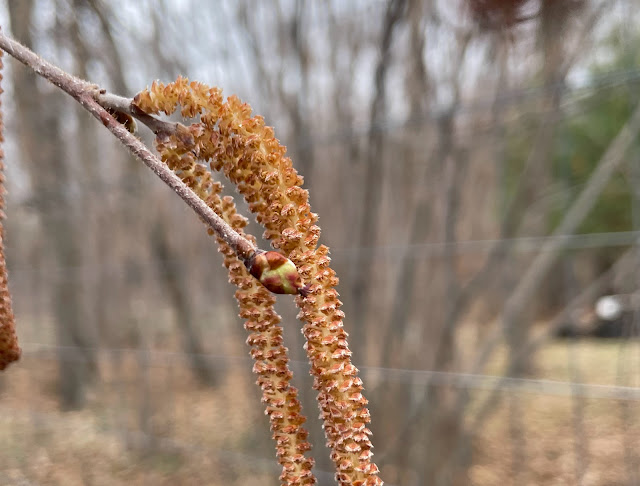
This year, 2023, started with a late spring with 3 ft of snow in the orchard. In the beginning of April we had a few warm days in the 50's and the catkins began expanding and releasing their pollen, then the temp dropped to 15º F on the 15th of April and stayed cool until May. Flowering and pollination usually occurs between 15th and the 29th of April. Then on May 7 the female flower began to appear at the same time as the buds began to swell, almost covering the flower. In the picture above you can just barely see the small red flower at the end of the bud.
I was trying to find information on flowering and bud-break. One article from Thomas Molnar of Rutgers state that the timing of flowering and leaf bud-break is determined by chilling and growing degree day requirements of about 9633. This spring I'll have to record the average GDH's for each day minus 39.9 and see if this holds true. This may help determine the flowering dates of my best plants for cross pollination.
The next problem this spring was spray damage from a lawn company that sprayed my neighbor's yard.
The white material on the leaves is not a pest but cotton from cottonwood trees in are yard.
The spray damage in this picture caused the new forming nuts to turn brown and fall off.
Some plants that were farther away had curled leaves but did produce hazelnuts.
I had just moved a few new seedlings out of the green house the day before they sprayed my neighbor's yard. The following day you can already see the leaves start to curl from the herbicide spray.
This is the same plants 4 weeks later.
I'm wondering if it will leaf out this spring.
I asked the lawn care company to be more careful and they told me it was a little herbicide drift and the plants will leaf out again. Then they snuck in early one morning a few weeks later and sprayed again.
I should have had them buy all the seedlings they damaged. I surely would not want to sell any of these plants.
These are seedlings that were moved out of the green house later after they had sprayed.
I just wanted to show what they're suppose to look like.
This was not the year for growing hazelnuts. The next problem was squirrels. On July 21 the tree-rats began remove hazelnuts which where not even close to being mature. They are not mature and ready to pick until the 2nd or 3rd week in August.
With a lot less nuts to pick I had time to evaluate each plant and cull the undesirable plants after picking the few nuts.
I removed the plant if it had EFB (Eastern filbert blight), small nuts, too thick of a shell, taste bad or if the plant tends to spread by suckering . I removed 86 plants that had 3 or more of these bad traits.
whoo! I almost cut this robin's nest down. It's a good thing the bird let me know it was up there.
Here are some of the stems that were removed. The center stem has the telltale cankers from Eastern Filbert Blight which would eventually kill the entire plant.
I try to burn all EFB stems.
These are a few of the stems I cut down.
In this picture I saved the larger stems for my wood working projects.
This is my latest wood working project, a plant stand with a ceramic tile for a top.
The tile was left over from a flooring project, and I don't think I will not run out of hazelnut wood any time soon.
This is my pest management system for mice and squirrels.
At the bottom of the picture are a pile of cut down hazelnut stems that are waiting to be removed.
Here we have our pest control patrolling the hazelnut orchard.
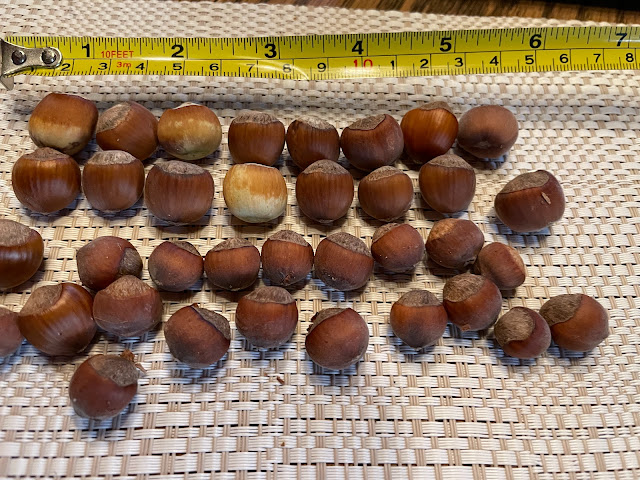
These are the different types of hazelnuts that I saved from the squirrels.
I think because of the dry summer and fall a lot of the nuts did not completely fill out. What I mean by not filling out is the kernel did not completely fill the shell.
The only plants that are watered are the newly planted seedlings and the 1 year old plants.
Watering the plants with the larger better nuts is definitely a good idea in dry conditions.
These two pictures are what the hazelnut orchard looks like after removing over 60 plants from this area.
The white paint indicates save and the red is remove.
If I where planting for maximum nut production the spacing would be 15 ft between rows and 5 to 8 ft in rows.
This is that same part of the orchard from outside the fence.
It looks as if no plants where removed.
The long and mild fall turned the orchard into some very nice fall colors.
Here is a look at the fall colors in another part of the hazelnut orchard.
This is the fall colors of a wild American hazelnut (Corylus Americana) that is from Northern Minnesota. It is the first to turn color and drop its leaves
This is a hybrid hazelnut with more of a orange leaf.
I just had to show this picture of the shagbark hickory's fall colors.
This tree grows 2 feet or more every year and is already over 30 feet.
Sorry to say no nuts yet.
I think it may be around 10 years old.
This year the sea buckthorn was loaded with these bright orange berries.
They looked great this fall and taste like grapefruit juice.
They are a little hard to pick with all the thorns.
I was at the NDSU tree arboretum near Absaraka which is now called the Dale Herman Research Arboretum, and found some of my hazelnuts still growing that Kelsey planted there when she was at NDSU. I was really surprised to find nuts on some of them. I had thought they had been removed a couple years ago. Another interesting thing is they have no squirrels there. I'll have to find out how they removed them.
Wishing you a Merry Christmas and a Happy New Year.


